Skip navigation

It has been a few months since we “finished” the project.  Things are running smoothly, and as of today the turbine has flawlessly cranked out over 5,000 amp-hours of clean energy!  Still a l-o-n-g way to go to the break-even point, but it’s nice to know everything works as expected.

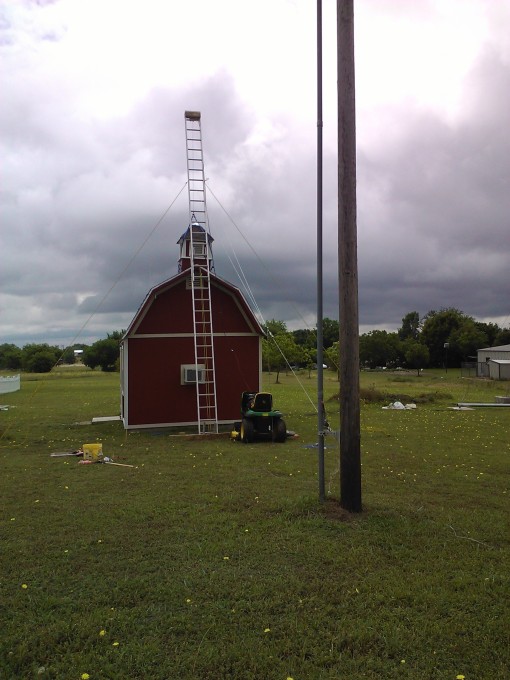
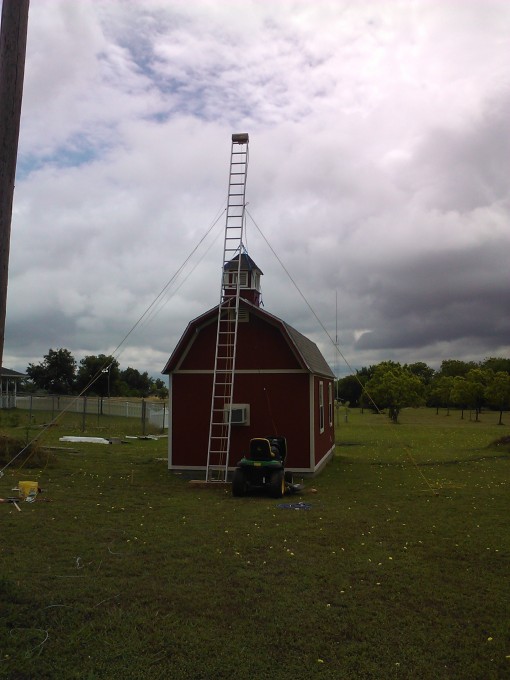
This weekend we added a cupola to the barn.  I built it a month or so ago, mostly from left-over materials from the barn construction.  Once it was completed I had one of those Homer Simpson “Doh!” moments, as I realized how heavy it was and had no idea how to get it from ground-level up to the top of the roof!  First I tried building a sled that would theoretically slide up a ladder.  The ladder was fully extended and laying on the roof at about a 60-degree angle.  I anchored a pulley to the top of the ladder and ran a rope from the ground, through the pulley back to the sled.  Confident in my plan to pull the sled up the ladder, I tied the rope to the little John Deere lawn tractor and went absolutely no where!  The rope stretched tight and the tractor wheels started slipping.  Back to the drawing board.

This past weekend I hit on the idea of using the ladder as a crane.  I built a bracket using 2×6’s (which aren’t really 2″ by 6″, but I digress) to mount a small electric winch.  Using rope to stabilize the ladder from side-to-side, I used a steel cable and a come-along to adjust the lift-angle.  As it turned out, the little John Deere tractor still had a roll to play, as the winch had to be powered by something!  Four cargo tie-downs were fashioned into a handy little sling.  It worked like a champ! 

Here are the pictures.  I didn’t think to take them until the cupola was already perched on the roof, so you won’t see the actual lift.
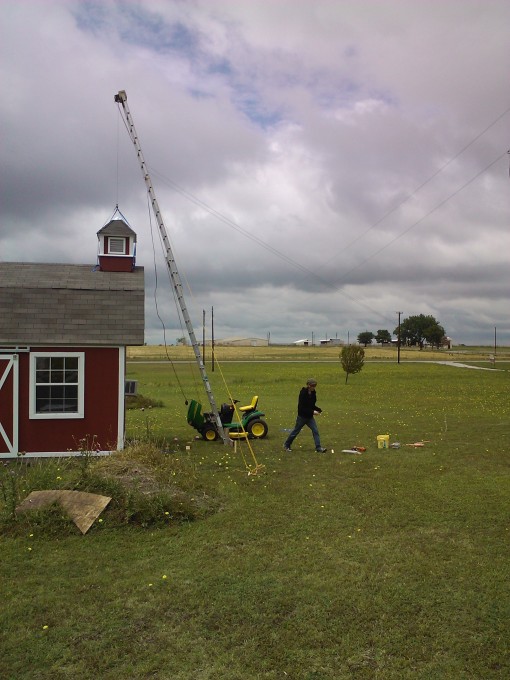


So here is the story.  My daughter and her family were in town for the holidays.  Jaris, my son-in-law, was eager to help as were my sons Stephen and Jordan.  I had some vacation time coming, so together we tackled the to-do list.

Jaris performed a great service by running the load calculations independently and verifying my own.  In the end, when the winch was turned-on and the turbine mast began to tilt into the air, it was reassuring to know that we both came to the same conclusions!  Jaris helped with the final conduit runs inside the building as well as pulling wires, installing the winch and planting the final ground rod.  He was a God-send!  When we finished our work on Friday the tower was lowered to the ground in order to install the turbine.

Stephen helped me wrestle with the trencher I rented from a local vendor.  It was quite a chore.  We had about 150 feet of trench to dig, and the machine wouldn’t move unless the two of us both pulled on it.  Couple that with a 4-hour rental agreement, and we had a recipe for some back-breaking work!

Jordan joined in on the fun on Saturday, installing the final conduit run to the tower base and running the wiring between the turbine and the battery barn.  He helped with the final assembly of the turbine and with the lift itself.

While all this was going on, I had two beautiful granddaughters entertaining us and bringing joy to all of us!  We played, explored, read books and enjoyed the short time we had together.  Having my family together for Christmas was truly a blessing!

On Saturday, December 31, we finished our work just as the wind began to abate.  After a quick (but thorough!) check of our preparations, we connected the winch control and proceeded with the lift.  With Jordan on the winch control and me running around checking guy wires and anchors, the turbine went up without a hint of a problem.  With the flip of a few switches, the blades began turning and we were in the power generation business!

And now you know the rest of the story!

At long last, the turbine was raised into position!  Around 5:00 PM CST on December 31, the final tests were completed.  The moment we had been working toward for so many months had arrived!  The switches were turned on and we began producing electrical power!  Here are some pictures.  More to follow…

Yours truly, anchoring the lift pole.


… at the end of the tunnel.  Barely discernible, but there is a definite faint glow!

No new pictures this week.  I built the main portion of the battery box and now I’m struggling with the decision on where it will ultimately sit.  The prefered location creates a longer wire run, and the alternative position (with the shortest possible wire run) makes it awkward to reach the panel controls.  The difference in wire length is about 2-1/2 feet, a seemingly insignificant amount, but when there is a potential for hundreds of amps to flow through it, each foot of wire becomes like a mile-long sharp incline to a runner.  The obvious answer is to increase the wiring size and put the batteries to the side.  Guess I’ll get with the budget director to see what she thinks!

The sliding door was also completed.  It still needs to be primed, painted and hung.  The lightning arrester has been mounted and wired to the turbine control panel.  I’m thinking of adding another one right at the base of the tower.  I don’t think one is needed on the AC side of the inverters as we’re not interconnecting with the public power grid.  The DC side is likewise unprotected – it is all contained within the building.  Oh, and the combination heater/air conditioner was installed, just in time for the cold weather!  I lack the trim work around the unit, but it is functional.

I still think we can be up and running by January 1.  There are a number of items that need to be completed, but many of them are aesthetic or otherwise non-critical and can wait until we go live.

Essential tasks:

  • Install the system grounding rod
  • Install AC wiring to well-pump
  • Dig trench between tower and building
  • Dig trench between winch pad and building
  • Dig trench between building and house
  • Install conduit in trenches
  • Run wire to tower, winch pad and house
  • Fill trenches (not critical, but…)
  • Fabricate and install lid on battery box
  • Seal battery box
  • Install conduit run between battery box and DC control panel
  • Install ventilation fan and exterior vent on battery box
  • Test ventilation system
  • Finish fabricating remaining battery cables
  • Place batteries in box and interconnect them (with fuses)
  • Connect batteries to DC panel
  • Test DC side of system
  • Test AC side of system
  • Install winches
  • Lower the tower
  • Install turbine
  • Test wiring between turbine and control panel
  • Verify operation of turbine stop switches
  • Double-check torque on all bolted structural elements of tower and guy wires
  • Raise tower and lock in-place
  • Perform a complete system test

Non-essential tasks:

  • Finish painting the exterior
  • Finish installing the exterior trim
  • Install the interior trim
  • Install shelving brackets
  • Finish painting the interior
  • Install the last ceiling light (after the painting is done)
  • Build cupola
  • Install cupola
  • Heat-treat the shingles on the east side that refuse to conform to the roof shape!
  • Install interior outlets
  • Install distribution panel in house
  • Move desired circuits to new panel
  • Install emergency generator

It’s cold and rainy here in north Texas.  Too messy to work outside.  I’m still nursing my broken fingers, so all-in-all it was a great weekend to stay inside.  Much of the wiring has been completed, and most of the battery cables have been made.  Here are the pictures, with labels by key components:

1. This is the turbine controller.  It manages the turbine itself and the battery charging functions.  Without getting too technical, the turbine feeds “wild” AC current to the controller.  The controller converts the AC power to DC and regulates the voltage provided to the batteries.  When the batteries are fully charged, the controller redirects the power to the diversion load (3).

2. The red box is the stop switch for the turbine.  Activating this switch stops the turbine and shunts the power leads feeding the controller.

3. This is the diversion load that “absorbs” the power from the controller when the batteries are fully charged.  It is essentially a set of four (big!) resistors that convert the excess electrical energy to heat.  It is mounted inside the building during winter and outside in the summer.  I may add fans to the unit to help distribute the heat in the room.

4. The gray panel is the AC load center for the room itself.  The outlets and water pump get power through this panel.


5. This is the panel that monitors and controls the power inverters.

6 and 7.  These are the inverters that convert the 48-volt DC battery power into AC power.  Each of these inverters is capable of supplying a little over 4 kilowatts in both 120- and 240-volt outputs.

8.  This is the AC control/wiring panel.  The AC output from the inverters is wired through control switches and circuit breakers in this panel.  Eventually a gas-powered generator will also be wired into the system through this panel.

9.  This is the DC control/wiring panel.  The battery power is fed through this panel to the inverters.  It also has circuit breakers to protect the system wiring and batteries.

10.  One of three sets of batteries.

11.  The conduit that contains the incoming wires from the turbine.  It penetrates the floor and connects to conduit that goes directly to the turbine tower. 


Lots to write about today!  We’ve made some progress, but lost some time to an injury.  Two weeks ago, while blowing insulation into the attic, the ladder I was standing on kicked-out from underneath me and down I went.  My hip took the brunt of the fall, landing on the top of the water-well pump stack.  The colors of that bruise rivaled that of the fall foliage!  Two fingers on my left hand were broken, and that is proving to be a problem.  It is difficult to work with one hand, even though the injury was to my “weak” hand. 

So, where did we leave off…  The ceiling is in-place and the insulation is two-feet deep in the attic.  We’ve started painting the inside and outside of the building.  The outside will be barn-red with white trim.  The inside will be white.  Here is a picture of the outside.  Note – the trim has not been painted yet.

Painting the outside.

 
The interior walls are about half complete.  We put the walls up where the control equipment will be mounted and painted it right away.  Then we started mounting equipment.  The AC and DC control panels are up, as are one of the two inverters and the turbine control panel.  The batteries are in the building, though the battery enclosure has not been built yet.  That shouldn’t be a problem as the batteries don’t produce a significant amount of gas while sitting idle. 
 
Most of the lights are up and functioning.  I still have three left to install.  I’m replacing the stock 120-volt AC ballasts with 48-volt DC ballasts.  Each ballast is rated at 1 amp, but my tests show they draw closer to half an amp.  Not too shabby!  Each of the eight lights will individually controlled.  At some point I intend to use a microprocessor to manage the lighting.  But not today.  In the interim we’ll use  some boring toggle switches.
 
With the warm fall weather the common house fly has become a bit of a nuisance.  They are everywhere and they are multiplying!  Could be worse I suppose.  The mosquitos aren’t a problem, after all!
 
Here is a shot or two of the inside. 
 

I took Monday off from work, giving me a three-day weekend to make some substantial progress on the battery barn.  And it was a perfect weekend, weather-wise!  The exterior siding was finally finished on Saturday, and the ceiling was put up on Sunday.  The attic insulation was blown-in Sunday evening and one-sixth of the wall insulation and panels were put in today.  We’re making headway!

For the ceiling, I rented a panel-lifter from the Home Depot.  This is a marvelous device that lifts ceiling panels into place and holds them there against the rafters until the nails/screws are in place.   At a mere $30/day, it was a bargain.  I also purchased 20 bags of blow-in insulation from HD, and they were kind enough to provide free use of a blower.  With Jordan feeding the machine and me on the business-end of the hose, it took less than an hour to stack the insulation 24-inches deep throughout the attic.

Next weekend we’ll finish the interior walls and at least get started painting the inside.  Then the excitement will start in earnest!  I’m really anxious to get started with the wiring!

Here are the pictures:

Some progress.  The siding on the east side is up, as well as the trim.  Still some caulking to do.  The siding on the bottom of the north- and south-sides is in place.  The south side has a pump-access panel that took quite a bit of time to complete.  The panel consists of two layers of 3/4-inch plywood, a layer of exterior sheathing and the siding.  I didn’t account for the actual thickness of the plywood when the panel was assembled.  Like dimension lumber, the actual measurements are less than the stated measurements.  Who knew?  One day this might all make sense to me, but for now it seems ludicrous.  Anyway, I put the panel together and hoisted it into place.  Literally.  It weighs a ton.  And instead of a nice even finish flush with the surface if the surrounding wall, the panel was about an eighth of an inch too shallow.  There ought to be a law!  Oh well, nothing a bit of creative shimming (?) can’t handle!

I also completed most of the interior wiring.  The wiring for the lights is complete, and the j-boxes for the outlets are in.  I drilled the holes in the wall headers for the outlet wiring so all that is left to do is run the actual wire to them.  

The lights are kind of cool.  I found a ballast that uses 48-volt DC power, the same voltage the batteries will be wired for.  Each ballast has a low-voltage signal port that turns the ballast on and off.  I bought ten flourescent fixtures, eight for the building and two spares.  Replacing the ballasts was easy, though I don’t know what to do with all the 110-VAC ballasts!  If you are interested in these DC ballasts, you can find them at nextekpower.com.

Next week I’ll either put the ceiling in or finish the siding, depending on the weather.  We had some rain this weekend and that slowed me down just a bit.  We really need the rain though, so no complaints here!

This slideshow requires JavaScript.

The building is wrapped, the windows and door are in and the siding is going up!  Jordan and I managed to get four panels up in a couple of hours today.  If that is any indication, maybe we can get the exterior completed next weekend.

We’re using Hardie Panel for the siding.  This is a composite cement-board that is impervious to weather and should last a bazillion years or so.  The panels are heavy but can be nailed with a nail gun, so installation is pretty fast.  The hardest part is cutting it.  The folks at Hardie recommend using a sharp knife to score the board, then breaking it along the score line.  A circular saw could be used, but it generates lots of dust that could be harmful if inhaled I suppose.  It also is tough on saw blades.  So we are going the knife/score/break route.  Our first cut wasn’t so good.  I scored the panel on the back and the front side didn’t break very cleanly.  Scoring the front was better and by the time we had the window surrounded, we were a couple of old pros! 

We started here on the south side, installing two full panels.  A third panel will eventually be added, but it will require a bit of work to fit the pump maintenance panel into place.  Rather than bog down on that, we opted to move on to the east side of the building. 

Two panels on the south side.
 
We needed to do some cutting to fit the window in, so out came the knife, a long straight edge and a fulcrum to break the panel over.  The results are acceptable, but I think the next round will be better.

What a magnificent door!

During the past few weeks we’ve been working to get the roof completed.  At first, I had planned to just cover the wood with roofing felt and leave the shingling (?) until after the exterior painting was complete.  That would make the masking job easier and prevent inadvertently getting paint on the shingles.  But a few days after getting the roofing felt up, the wind picked up and I spent a day at work worrying about what was happening to the roof.  I imagined going home and finding 1,000 staples with little black tufts of roofing felt stuck to the roof, and the rest gone with the wind!  The felt held up very well, though, but I didn’t want to go through all the worry and angst again.  So this weekend we finished the roof.  Jordan helped out and we were able to get the shingles up in two days.  The gambrel roof was a challenge, and not having a lift or scaffolding made it all the more difficult.  I ended up building a scaffolding of sorts that mounted to the side of the building.  With three levels, it made the steeper side of the roof a piece of cake. 

I don’t remember if this had been reported yet, but the inverters and related power panels arrived during the week.  I had the very good fortune of working with Alana at Fire Mountain Solar in the great State of Washington to procure the electrical amenities.  Prompt, courteous, professional, fair, knowledgeable and connected to the right suppliers, all of these things describe the folks at FMS.  In just a matter of days, the equipment was sitting on my driveway.  Needless to say, they will be the first company I go to when I order the next inverter!

So all the major pieces are here.  I’m anxious to start getting on with the electrical side of this project, but the construction work has to come first.  I’m guessing it will be another month before the wiring begins.  Next week we’ll get the building wrapped, the windows and door installed and start putting the siding up.  Then comes painting and the interior work (insulation, ceiling and walls, battery box, etc.)  It never ends!  In the meantime, my house looks like the debris field from a bombed-out power plant!  Wire, fixtures, switches, controllers everywhere.  I even have the tail for the turbine in the study!  (It is very big!) 

Here are the pictures…

This slideshow requires JavaScript.