Skip navigation

This is turning into quite a project!  When I started down this path, I had no idea how long it would take to build a simple building.  My plan called for completion in six weeks, but that was nothing but a WAG.  Now it is apparent that it is going to take longer, much longer, than six weeks.  But that’s okay.  No real rush (though I am very anxious to get the turbine up in the air!)

This week the roof sheathing was finished.  No drama this week!  Just a lot of hard work.  Jordan gave me a hand on Sunday, and that was greatly appreciated!  In the photos you might notice the 2-foot by 4-foot hole in the roof.  This is the access port to the well.  If the pump should ever fail, the well guys can pull it out through this hole in the roof.  Next week I plan to finish the hatch that will cover this hole.  I also need to finish sheathing the gable walls. 

The light fixtures are in, as well as the 48V DC ballasts.  I plan to install the ballasts during the week so the lights will be ready to go.  I also ordered the battery cable and terminals.  The last major purchase is the power inverters.  These devices convert the DC power from the batteries into AC power for the house.  I’m looking at a pair of Magnum Energy MS-PAE inverters.  These machines can be connected in parallel to provide additional power, something that will simplify distribution.

Here are the photos…

This slideshow requires JavaScript.

This category will be used to post discussion items regarding design thoughts, issues and decisions.  Feel free to chime-in on any or all as you see fit.

Up first, I’m considering adding sprinkler protection to the battery barn.  Nothing elaborate, just a residential-type fast-acting system that meets the requirements of NFPA 13R (the standard for residential sprinkler protection.)  The well can provide around 24 gallons-per-minute at 35 psi, more than enough for the 288 square-feet of space in the building.  My concern is the remote area I live in.  The volunteer fire department would probably arrive in time to save the foundation.  A fire alarm system would be useful if there were people here around the clock to monitor it and respond to alarm conditions.  But that isn’t always the case.  Sprinklers are very effective and the additional expense might be offset by lower insurance rates, though I doubt it.  Anyway, it seems relatively easy to do and the peace of mind it would bring would seem to make it worthwhile.  There is the question of the electrical equipment in the building.  The whole water and electricity don’t mix issue.  And what happens if the eventual fire is caused by an electrical fault and the well pump stops working?  What other issues have I not thought of?

The weather is finally changing!  Yesterday (Sunday, September 4) the high was 88!  Sunny, breezy and blissfully cool.  And today it only made it to 82.  With the cooler temperatures we were able to work longer, but it seemed that we didn’t get very much done.  More roof construction.

First we had to fix a mistake I made last weekend.  Chalk it up to the whole heat exhaustion episode.  I inadvertently put a roof truss directly over the water well.  This is not good.  One of the features we are building into the barn is a removable panel on the roof to allow access to the water well.  This is necessary to allow the pump to be removed in the event it should require servicing.  The pump is at the far end of a 600-foot pipe, and the only way to get to it is to pull the pipe out of the ground.

So – the roof truss over the pump had to be moved.  We pried and lifted, moving the truss one-foot to the south.  Now I had another problem.  There was now a three-foot gap between the trusses.  There was nothing to do but build another truss and place it in the gap.

Once that was complete, it was time to build the end-trusses and the frame for the overhang.  We finished that this morning and spent the rest of the day hoisting the end-trusses into place and nailing them down.  Then the day was over.  Time to clean-up and get ready for the work week.  Next week perhaps we’ll finish the roof.

A couple other notes – Did I mention the batteries are here?  They arrived on Wednesday, all twelve of them.  They are sitting on a pallet at the end of my driveway, waiting to be moved into their new home.  Just a few more things to complete before that can happen.  I need to make a decision on how to wire them.  Crimping the terminal ends requires an expensive tool.  But it is fast and easy to do.  The alternative is to solder the terminals on to the wires.  Not so fast and a little trickier than crimping.  But less expensive.  Decisions, decisions. 

Also the T-8 fluorescent light fixtures arrived.  I purchased ten of them on ebay.  I also purchased eight (ea) 48v light ballasts to put in the fixtures.  This will allow the lights to be powered directly by the batteries.

Only two pictures this week…

North end

South end

Here is a two-week update.  The main roof trusses were completed last weekend.  It was not quite the cool, comfortable venture I had envisioned.  The trusses were too large to build in the garage.  Alas, no shade!  So we worked outside, with frequent water and cooling-off breaks.  (Have I mentioned how much I like my inside job?!)

The mitre saw was set-up next to a temporary table made from 3/4-inch plywood and two sawhorses.  The table gave us a surface to support the lumber while it was being cut, and it provided a place to clamp “stops”.  I wish I had taken a picture!  The stops were used to cut each piece the same length.  Here is how it worked:  The lumber being cut was placed under the saw and slid until it reached the stop.  The board was cut and the next piece was positioned the same way.  I hope that describes it sufficiently.  The bottom line: we could cut all of the truss members to the exact (or nearly exact) length they needed to be quickly and without having to make lots of measurements.

Three sheets of OSB were used as a base for the jig.  The truss pieces were positioned on the OSB and wood guides (from scrap lumber) were nailed in place.  These guides were then used to position and build the remaining trusses.  It went reasonably fast, though there were problems with some of the lumber.  It was so twisted and warped.  No way to make it fit.  That meant additional truss members had to be cut.  But the delay was minimal.

Position the truss members.  Apply glue at the web joints.  Place a plywood web plate over the joint.  And nail like you mean it!  Flip the truss over and do the same thing on the other side.  Repeat 10x.  Try not to think about the heat or the sweat dripping off the end of your nose.  Remind yourself that this is a good thing you are doing, and you are having fun!

The following weekend it was time to put the trusses on the roof.  But how?  A crane would have been downright handy!  Lacking the financial capacity for one of those, my first idea was to fashion a ramp on the side of the building and slide the trusses up.  Clumsy, but it worked.  I used twelve-foot 2×4’s for the ramp.  We managed to get two trusses up on Saturday.  

On Sunday I tried a different approach.  Nailing short pieces of scrap lumber on the ends of the bottom horizontal truss member (what would ultimately be the ceiling joist), I was able to raise the truss upside down and place one side at a time on the supporting wall.  That’s not a very good description, and I wish now that I had taken a moment to get a picture.  Hmm.  Imagine if the truss was in position on top of the two walls that it rests on.  Now imagine that the top of the truss was pushed so that it would fall over.  The end result is the truss would be hanging upside down, held up by the two walls.  To get it back into the proper position, all we need to do is push the top of the truss (which is now hanging down) through a 180-degree arc so that it rests in the upright position.  (I’m not very good at this description thing, am I?!)    Then a nail here and a support there and voila!  The truss is securely in place!  And it only took one person!

By noon on Sunday I had six of the trusses in place.  After lunch Jordan gave me a hand and we put the rest of them up using the hang-and-pivot method.  It was even easier with two people!  Even so, I was reaching my limit as the heat was taking its toll.  By the end of the day I was exhausted.  It was difficult to think clearly and my muscles were cramping.  Even though I had consumed gallons of water and Gatorade throughout the day, my poor old body had had it.  I took a shower and collapsed under a ceiling fan.  In retrospect, I think I might have pushed myself just a little too far and actually flirted with heat exhaustion.  Note to self: We have the rest of the year to finish this.

A couple other notes.  To the discerning eye, it may appear that the cross-bracing nailed to the trusses is crooked and haphazardly placed.  I wish I could say otherwise, but the fact of tha matter is, it is crooked and haphazardly placed.  What can I say, I was tired.  But it is temporary and will be removed when the permanent braces are up.  And another milestone was also reached today – the batteries have arrived!  They are still in town at the local lumber company, who graciously accepted delivery and will be bringing them to us in the next day or so.

Here are the pictures.  Maybe they will help with the whole “upside-down-hanging-truss” visualization!

BatteryBarn 001

Jordan helping brace the first two trusses.The ramp used to slide the trusses onto the top of the walls.

The main trusses are in place!

Note the smooth lines of the temporary supports (not!)Here's how they look from the inside...The water well occupies about a quarter of the floor space.

The batteries will go on this end.The old pump house and the new.

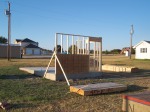
We had fabulous weather on Saturday (August 13), with temperatures in the lower 90’s and generous cloud cover.  A nice breeze added to the overall comfort factor, and we were able to get quite a bit done on the battery barn.  As the pictures will show, the walls have been framed and the exterior sheathing installed.  Both my sons were heavily involved in this effort, and I think they did a remarkable job!

The building itself is not so remarkable.  Just a 12-by-24 foot rectangle, to be topped ultimately with a gambrel-style roof (hence the “barn” label.)  The book I purchased to help guide us through the carpentry maze was most helpful, and the walls went up in no time at all.  We used a pneumatic nailer (thought by some to be cheating – a point I kind of agree with from a pure craftsman perspective – more on that to follow) and a new mitre saw, two tools that saw a lot of action! 

It would have been quicker and easier to have a steel building erected on the site.  But there is a certain amount of pride to be taken in doing the work ourselves, and we’re not in any big hurry.  Building it ourselves also saves a little money, as long as we don’t factor in the cost of our labor!

Now its onward to the roof.  We are going to fabricate trusses for the roof on the ground, then hoist them into place.  Sounds easy, but we’ll see.  The good news is we can actually work out of the sun for a while!  We are going to build a “jig” (that’s what the book calls it!) in the garage and use it to position the truss members for gluing and nailing.  It could be downright comfortable with the right kind of breeze!

Oh, and a follow-up word on the pneumatic nailer.  This device uses an air-driven piston to punch nails into place with a single pull of a trigger.  The nails are loaded into a spring-loaded magazine, not unlike a rifle.  (The similarities don’t end there.  The nailer also has a trigger, a safety and a chamber.  If only it had a scope!)  The lumber is placed into the desired location and the nailer is positioned against the wood at the precise location where the nail should go.  Then BAM!  With the pull of the trigger, we were driving 3 1/4-inch nails into the wood.  It would take me at least 4 blows with a 16-ounce hammer to do the same thing.  And that is assuming I don’t bend the nail, or worse, send it flying into outer space as a result of a near miss with the hammer.  The time it saves is astounding.  But it isn’t effortless.  The tool weighs nearly ten pounds, not including the air hose and nails.  After a few hours of holding that thing up one begins to appreciate that there is no free lunch here.  It truly did make the assembly go faster, but it was still a chore!  Not that I’m complaining!

Here are the pictures –

Stephen and I

Stephen and I, discussing the finer points of balloon-frame construction...

 
Jordan

Jordan is busy nailing a top rail in-place.

Stephen

"I think it's too long."

 
Finished

The walls are up!

Done for the day

We are done for the day.

It was a balmy 108 degrees today, just right to start framing the battery barn!  The lumber was delivered on Wednesday, and a Dewalt 12-inch miter saw was added to the tool inventory.  Stephen picked up a Paslode pneumatic framing hammer a couple of weeks ago, but he was not able to make it up this weekend.  So I pored through the Framing for Dummies book and got to work with an old-fashioned hammer! 

I was able to complete the south wall and half of the east wall.  By complete I mean these components have been framed and erected.  There is still the outside sheathing and siding to do.  But all in good time.  The outside temperature was too high to allow extended periods of activity.  I’d work for about an hour, then come inside for ice water and a wet towel treatment.  Next week Stephen (and the air nailer) should be here, so things should go quite a bit quicker.

Here are the pictures.  I just took two, as there wasn’t much to show.

Another milestone has been reached.  The concrete foundation for the battery house has been poured!  the concrete guys were out in full-force yesterday and despite the record-high temperatures, managed to complete the work on the slab.  Time to order the building materials and erect the small building that will house the water pump and captive-air tank, the batteries and the inverter/charging equipment.  It will be a small building, approximately 12-feet x 24-feet.  I plan to incorporate barn-like features to make the building appear more at-home in the countryside.

This slideshow requires JavaScript.

The pictures show it so much better than I can say it.  So take a look at these…

So here’s how things went.  We managed to get everything in-place and ready to go in a couple of hours.  The gin-pole lift cable was strung from the winch to the pulley anchored on the opposite side, over the top of the ladder and finally fastened to the top of the gin-pole.  The plan was to reel in this cable, using the ladder to provide leverage and “lift”.  It didn’t take long to experience the first problem: While the ladder is very capable of supporting a hefty load, it is designed with the human foot in mind.  The cable localized the weight of the gin pole and the rung it was strung over failed. 

We moved on to Plan B.  A two-by-four was cut to fit over the second rung.  Liberal doses of duct tape were applied to secure it in place.  The ladder was placed back in position and we were off to the races.  Then one of those laws from that fellow Murphy made itself known.  As the top of the ladder followed the cable down, the bottom of the ladder lost its grip on the ground and kicked out, causing the pole to come crashing to the ground.  A quick check brought sighs of relief – no damage was done.  Time to devise another plan.

The bottom of the ladder was secured with a short length of steel cable.  The lift was started again.  At about the same place as before, the ladder dropped its load and again the gin-pole fell to the ground.  Another survey and again there was no damage visible.  Time to take a break and think this through.

Here is what was happening:  The top of the ladder followed the cable toward the ground.  at some point, the angle was such that the force pulling down on the ladder became greater than the force of friction keeping the ladder in-place.  The ladder simply fell out from under the load.  The solution was relatively easy.  Instead of starting with a vertical ladder, I tilted it about 10 degrees toward the gin-pole.  Then, as the pole was hoisted, I paused the lift to attach a come-along between the west anchor and the top of the gin pole.  Keeping this cable tight insured the pole would not fall again. 

Voila!  The gin-pole went up and in short order it was secured to the mast.  The second winch was installed and together, both winches hauled the gin-pole back down, lifting the taller heavier mast almost effortlessly.  The guy wires were checked and adjusted and the mast was lowered to horizontal.  A quick check of all the connections and we lifted it back to vertical.  And that is where it is now.

Woo hoo!

The concrete for the anchors and mast support was poured on May 31.  It had to sit for 28-days without stress to achieve the minimum level of strength needed to do the job.  As of now, we can start working in earnest!  Assuming the weather cooperates, we’ll complete the mast and lift-pole assembly this weekend and raise the tower for the first time!  It will not carry the turbine yet, as there are still many things to do before that can be accomplished.  But I’ll need to practice raising and lowering the tower, and making adjustments to the guy wires before bolting the turbine in place.  I’m not expecting any problems, but if things should go south, I’d rather not have that expensive piece of equipment falling to earth!

So, God-willing and the creek don’t rise (and the winds are calm), we’ll hoist her up either Sunday or Monday.  Photos will be posted, regardless of the outcome!

On another note, the turbine shipped today from the manufacturing plant in Flagstaff, Arizona.  It is travelling courtesy of FedEx and I will be able to track its progress via the miracle of the Internet!  I’m expecting it in seven- to ten-working days; perhaps as early as July 8?  In lieu of the high-voltage model, I’ve opted for the 48-volt DC turbine.  There will be some adjustments to be made in the design, as the lower voltage unit will require larger wire.  Fortunately the only wiring that I’ve installed is in the tower itself.  It should be a relatively simple matter to pull the 14-gauge wire out and put 8-gauge in its place.

We have to get the concrete guys back out to pour the foundation for the battery house.  They are so busy these days!  Makes me wonder where this recession is that so many are talking about!

Turns out the step-down transformer wasn’t included in the price quoted for the turbine.  The transformer is an additional $2,800 AND it requires a 12-week lead-time.  I’m curious about the rational behind selling the transformer separately.  I mean, the controller that ships with the turbine can use either 24, 36 or 48 volts DC.  The turbine is cranking out 240 volts wild AC (alternating current at variable frequencies.)  How many people have spare step-down transformers and rectifiers sitting on a shelf at home collecting dust?  I’m a little miffed at the supplier for this seemingly devious marketing ploy.  Had the turbine arrived at my house sans transformer I would have been forced to pay the nearly $3K.  (I suppose I could opt to ship the unit back and spring for the shipping and the restocking fee, but that would add up to a costly penalty as well.)

After a few email messages to the manufacturer (Southwest WindPower), we’ve arranged for a 48-volt DC turbine to be shipped immediately.  All the existing wiring and possibly the conduit run in the turbine mast will have to be replaced.  I suppose that will be my task next weekend.  I would also like to start documenting the design decisions that were made in preparation for this project.  Obviously one of those decisions will have to be reconsidered in light of this issue.  Maybe I should start there and work my way back to the batteries.  That way I will redesign the system and document it for anyone who might stumble on to this site.  The old two birds with one stone trick!